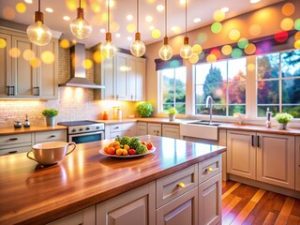
Cabinet Refacing is a less expensive and less disruptive process than replacing your kitchen cabinets. It involves installing new drawer and cabinet fronts, but keeping the existing cabinet boxes intact.
It is an ideal choice for homeowners who want a new look for their kitchen, but don’t need to change the layout.
Cabinet refacing is an excellent option for homeowners who want to update their kitchens at a fraction of the cost and time required by a full renovation. It also requires less demolition and disruption of your home, allowing you to keep living in your kitchen while the project is underway. While many homeowners choose to reface their cabinets using solid wood, there are other options available. These include laminates, composites, and thermofoil. Each material has its own advantages and disadvantages, so it’s important to understand the differences before deciding which one is right for you.
Solid wood is a popular choice for cabinet refacing because it offers a rich, high-quality aesthetic that complements a variety of styles. Its durability makes it ideal for kitchens with heavy use. Over time, it resists dents and scratches, is less prone to warping, and can be refinished easily. However, solid wood is usually more expensive than other refacing materials.
Laminated doors and drawer fronts are an affordable cabinet refacing option, offering a wide range of color and design options. They’re also resistant to heat and moisture, making them a good choice for modern and contemporary kitchens. However, laminates can delaminate over time and are prone to peeling. In addition, they are susceptible to damage from rough handling.
Composite and engineered materials may be less expensive than solid wood when refacing your cabinets, but they can deteriorate quickly. Laminates can delaminate or lose their integrity, and composites can swell in humid conditions. In comparison, solid wood will last for decades and retain its beauty over time.
NHance’s cabinet refacing process, Color Shift, allows homeowners to change the color of their existing solid wood doors and drawer fronts without the expense of replacing them entirely. This service involves the application of several coats of hand-applied paint to the wooden surfaces. These coats can be tinted with a variety of hues, including black, gray, white, and brown. In order to ensure a quality finish, this service is performed by skilled technicians and uses only the highest-quality products. This minimizes waste and environmental impact.
Medium-density fiberboard (MDF)
MDF is an engineered wood product made by mixing pulverized wood fibers with resins and wax, which are then pressed together under heat and pressure. This material is more affordable than real wood and can be cut easily with standard woodworking tools. It also has a smooth surface that is ideal for painting and is resistant to water. This makes it a popular choice for cabinetry, furniture, and other projects that require a lot of paint.
MDF cabinets offer a stunning appearance and durability, but it’s important to note that they can still suffer from natural wear and tear. For example, they can acquire dings and scratches over time, but these can be easily repaired by repainting them. Additionally, MDF is susceptible to moisture and should be treated carefully. It’s essential to use slow-closing hinges and moisture-resistant materials to prevent damage.
Medium-density fiberboard is a great choice for cabinet refacing projects because it’s versatile and affordable. It’s also more durable than solid wood and can be fabricated into complex shapes. It’s also easier to work with than plywood, and it’s available in a wide range of thicknesses.
Another advantage of MDF is that it can be shaped with a router, which can help achieve the desired shape for your project. It’s also easy to cut and can be machined into precise tolerances. It’s also more stable than plywood and can resist warping or bending. It’s also more resistant to changes in humidity than solid wood, and it can be coated with a vinyl layer for added protection.
MDF is available in a variety of textures and patterns, and it can be laminated with decorative overlays to create a custom look for your home. It’s a great option for homeowners who want to add decorative touches to their kitchen cabinets. The material is also available in different colors, allowing you to choose the perfect color for your home. Alternatively, you can opt for Rigid Thermofoil (RTF) for a more contemporary look. RTF is a hybrid of MDF and vinyl and offers a more realistic wood grain pattern.
Pressure-sensitive wood back veneers
Pressure sensitive adhesive (PSA) veneers are a quick alternative to applying wood veneer with a liquid adhesive. They are made of veneer that has a layer of adhesive film applied to the back, making them easy to cut and trim with standard tools. They can be used in a variety of projects, including cabinet refacing, speaker building, and more. PSA veneers are available in 24×96” sheets and come in a wide range of species. They can be trimmed with a laminate slitter, which has a sliding blade that cuts strips of wood veneer to specific lengths.
When working with a PSA veneer, it is important to let it acclimate to the environment in which you work before use. This will help prevent any problems with the adhesion process. It is also a good idea to apply a small amount of water-soluble contact adhesive to both the surface on which you will be applying the veneer and the back of the PSA veneer itself.
Once the PSA veneer has acclimated, it’s time to begin your project. Start by selecting a strip of veneer that is slightly larger than the exposed end panel. This will give you a little room to trim the excess. Once the first strip is glued and smoothed, use a utility knife with a razor blade to trim the remaining excess veneer. Be careful not to gouge the face frame or any of the other exposed ends.
Using a 100-grit sandpaper, sand the face frames to remove any contaminants that might interfere with the bonding process. After sanding, wipe the surfaces with a damp cloth to remove any dust or debris that may be left behind. You should also sand any rough areas that need it.
Before you apply the veneer, prepare the substrate by sanding it with 120-grit sandpaper or a random-orbit sander. Make sure the surface is clean and free of grease or oil, as these can cause the veneer to adhere poorly. Lastly, you should wipe the substrate with a damp cloth and allow it to dry completely before proceeding with the refacing project.
Plywood with a veneer core
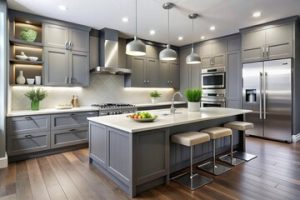
Cabinet refacing is a popular kitchen remodeling option that is cost-effective and time-efficient. This process involves replacing the cabinet doors and drawer fronts without removing or modifying the existing cabinet boxes. It can be completed in a few days and can add an instant facelift to your entire kitchen. Refacing is also a great choice for homeowners with busy lifestyles, as it requires less maintenance than painting or staining cabinets.
The material you choose for your cabinet refacing will have a significant impact on the durability and cost of the project. There are many different options to consider, including laminate, solid wood, and veneer. Each offers unique advantages and features, but they all provide an attractive, durable finish.
Wood veneer is an excellent choice for kitchen cabinet refacing. It is strong, moisture-resistant, and easy to clean. It is available in a variety of colors, textures, and patterns to suit any style preference. It can be installed over other materials such as medium-density fiberboard (MDF) or plywood. It is also less expensive than refacing with solid wood.
Plywood with a veneer core is another good choice for cabinet refacing. Its strength and stability make it a great alternative to particleboard. It has an impressive screw holding capability and is available in a wide range of species. It is also lightweight in comparison to composite options, making it easier to handle during installation.
There are two types of cabinet refacing plywood: pressure-sensitive adhesive and non-adhesive. The adhesive version is designed to adhere directly to the cabinet surface, which can reduce installation time and costs. It is also sturdier and more resistant to damage than the paperback varieties. It is ideal for face-frame applications and larger surface areas.
Decorative laminate veneer is another good option for kitchen cabinet refacing. It is available in a wide variety of textures and designs, and can be used to create a modern geometric pattern or a classic wood grain. It is easy to clean and scratch-resistant, and it comes in a variety of colors and finishes.
Laminate cabinet refacing is an affordable and durable option. It is made from PVC (Polyvinyl Chloride) vinyl film that is thermoformed over a medium-density fiberboard (MDF) surface through heat and vacuum pressure, fusing them together. It is available in a wide varietyof colors and patterns and can be finished with a gloss or matte finish. It is an excellent option for homeowners with children or pets, as it is scratch-resistant and easy to clean.